How to upload Shopify customers to a Meta Custom Audience (with lifetime value)
A step-by-step guide to exporting your Shopify customer list, formatting it for Meta, and building value-based Lookalike Audiences from lifetime spend.
Your Shopify store knows exactly who your customers are and how much each of them has spent over their lifetime. Meta's ad platform can turn that knowledge into some of the highest-performing audiences available — but only if you get the data in correctly. This guide walks through the whole process: exporting your customers from Shopify, formatting the file the way Meta expects, uploading it as a Customer List, and using it to build a value-based Lookalike Audience.
Step 1 — Export your customers from Shopify
Don't export straight from the default Customers list — it's easy to accidentally pull the wrong group (like only email subscribers). The reliable way is to export from a segment, which lets you export exactly the customers you mean to.
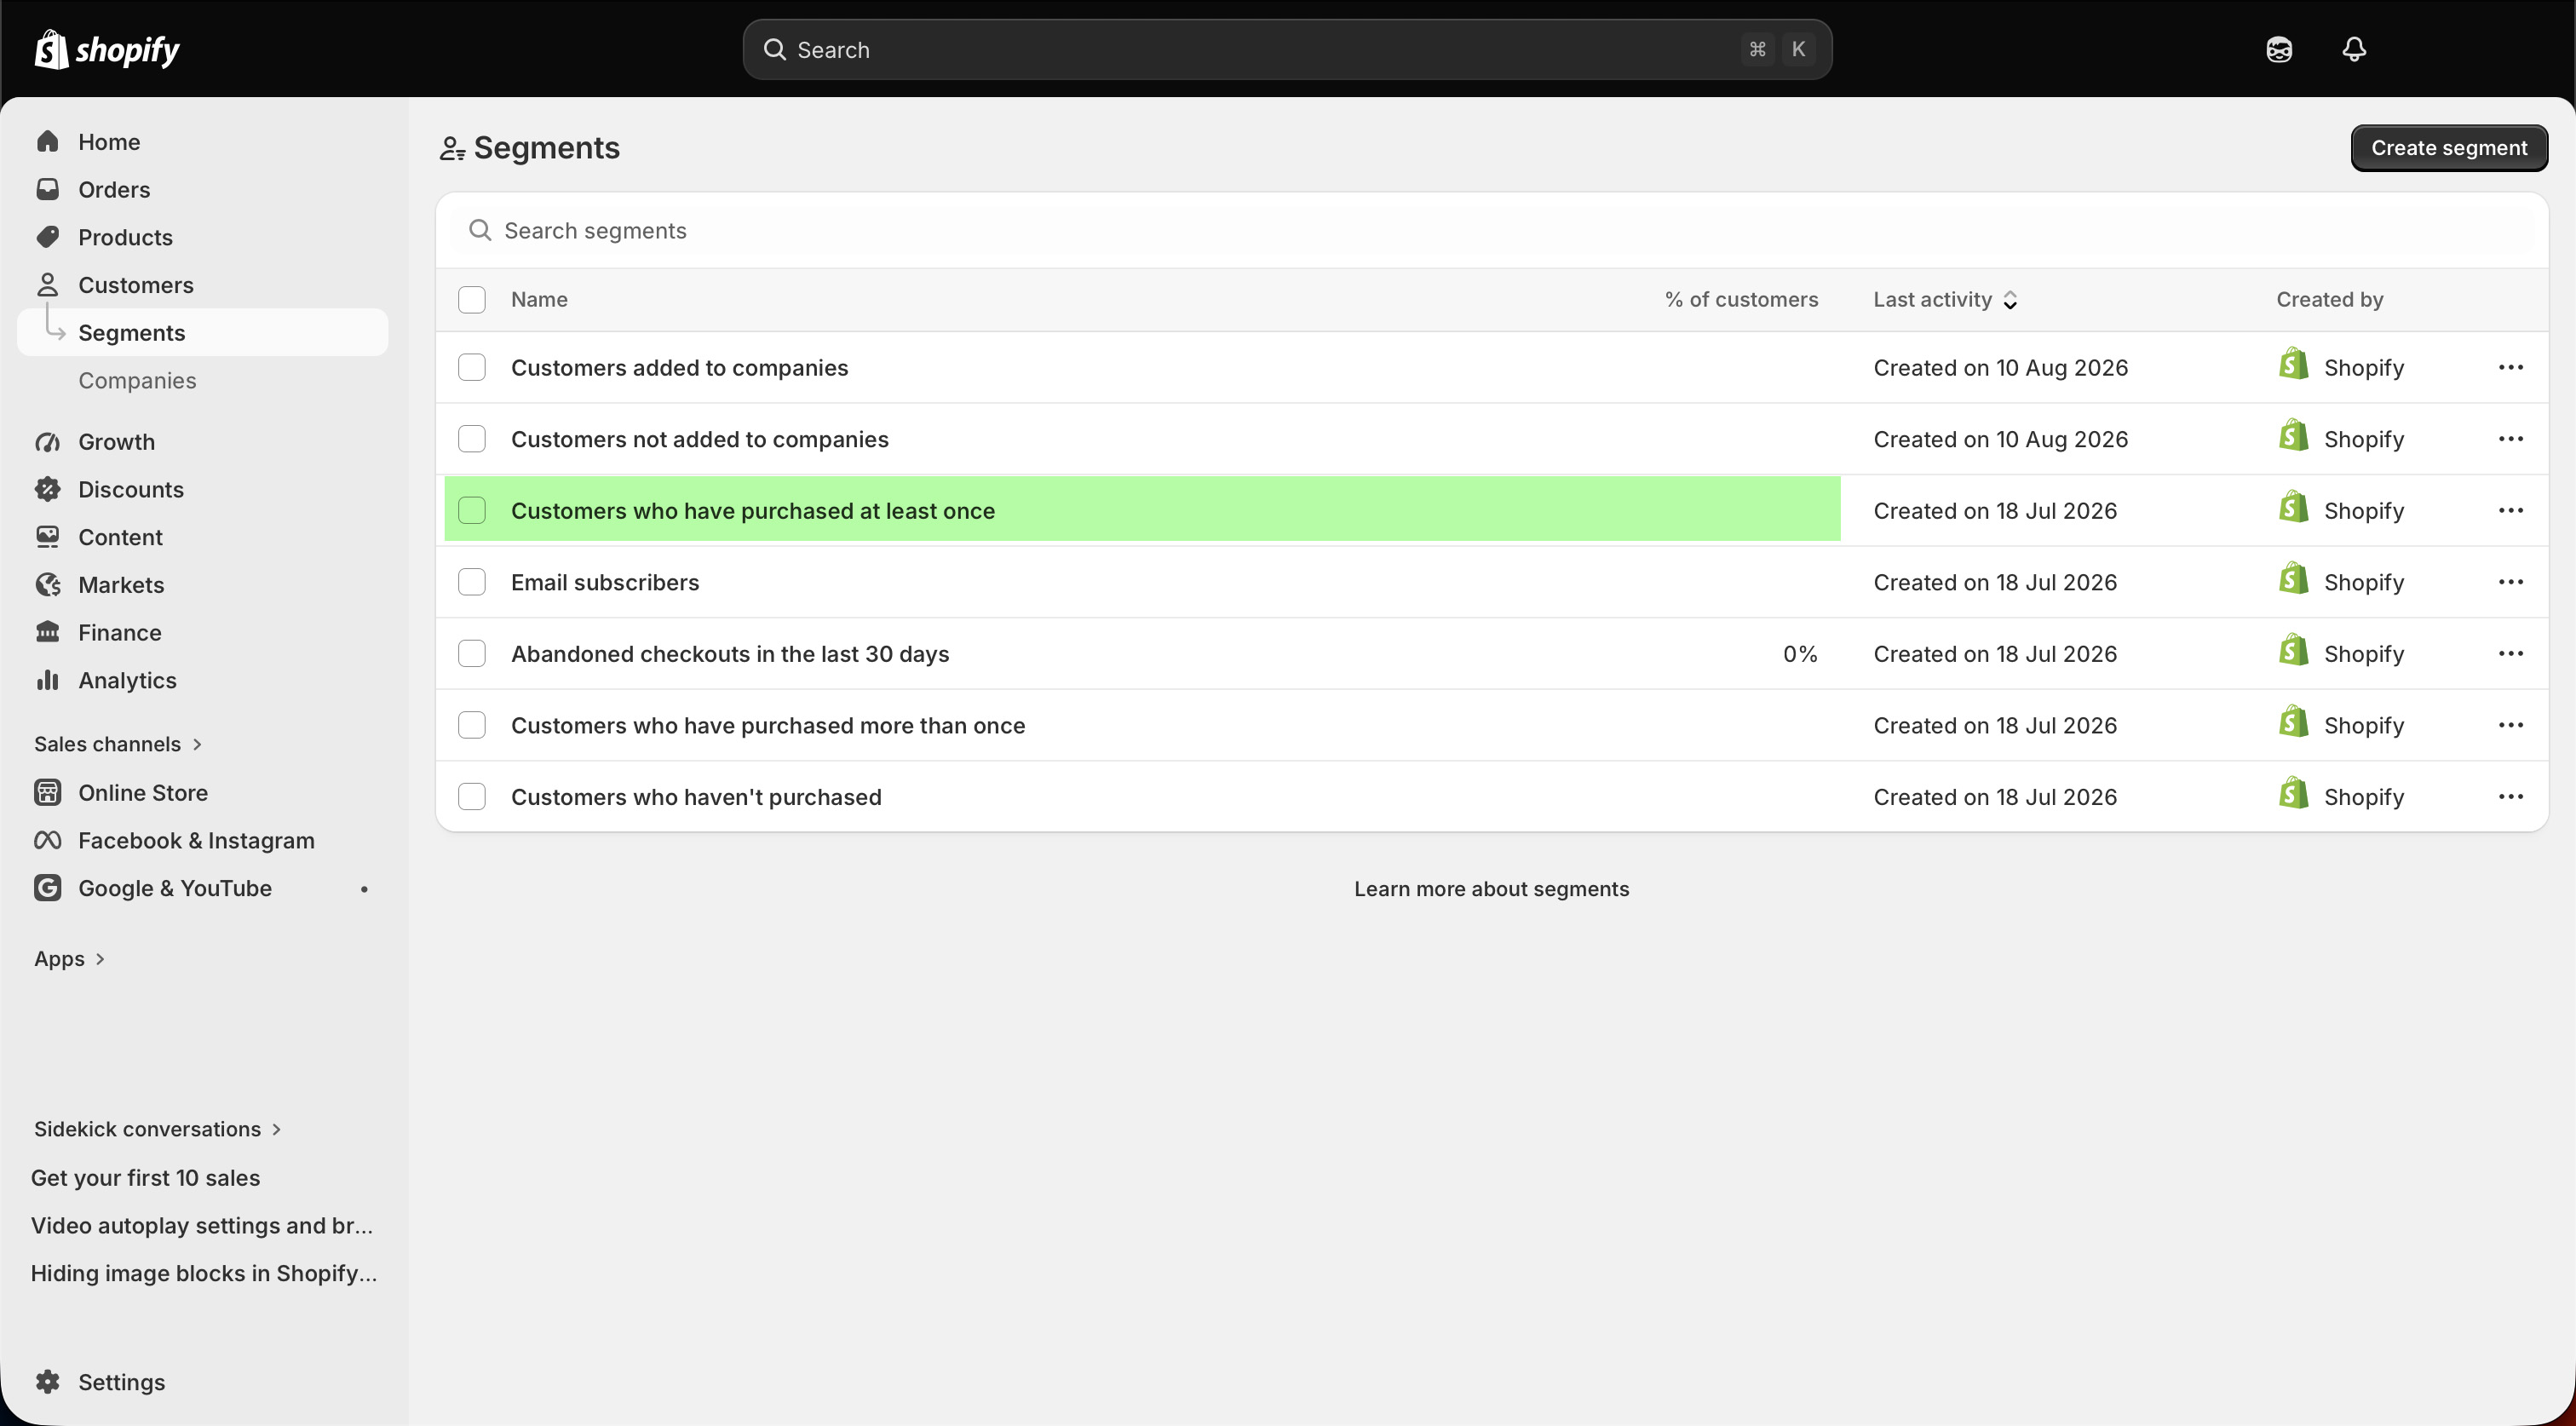
- 1Go to Customers → Segments
In your Shopify admin, open Customers in the left sidebar, then click Segments.
- 2Open the “Customers who have purchased at least once” segment
Shopify creates this segment for you by default — you don't need to build it. It's exactly what you want for a value-based audience: everyone who has placed at least one order, which is a much better source list than the email-subscriber segment.
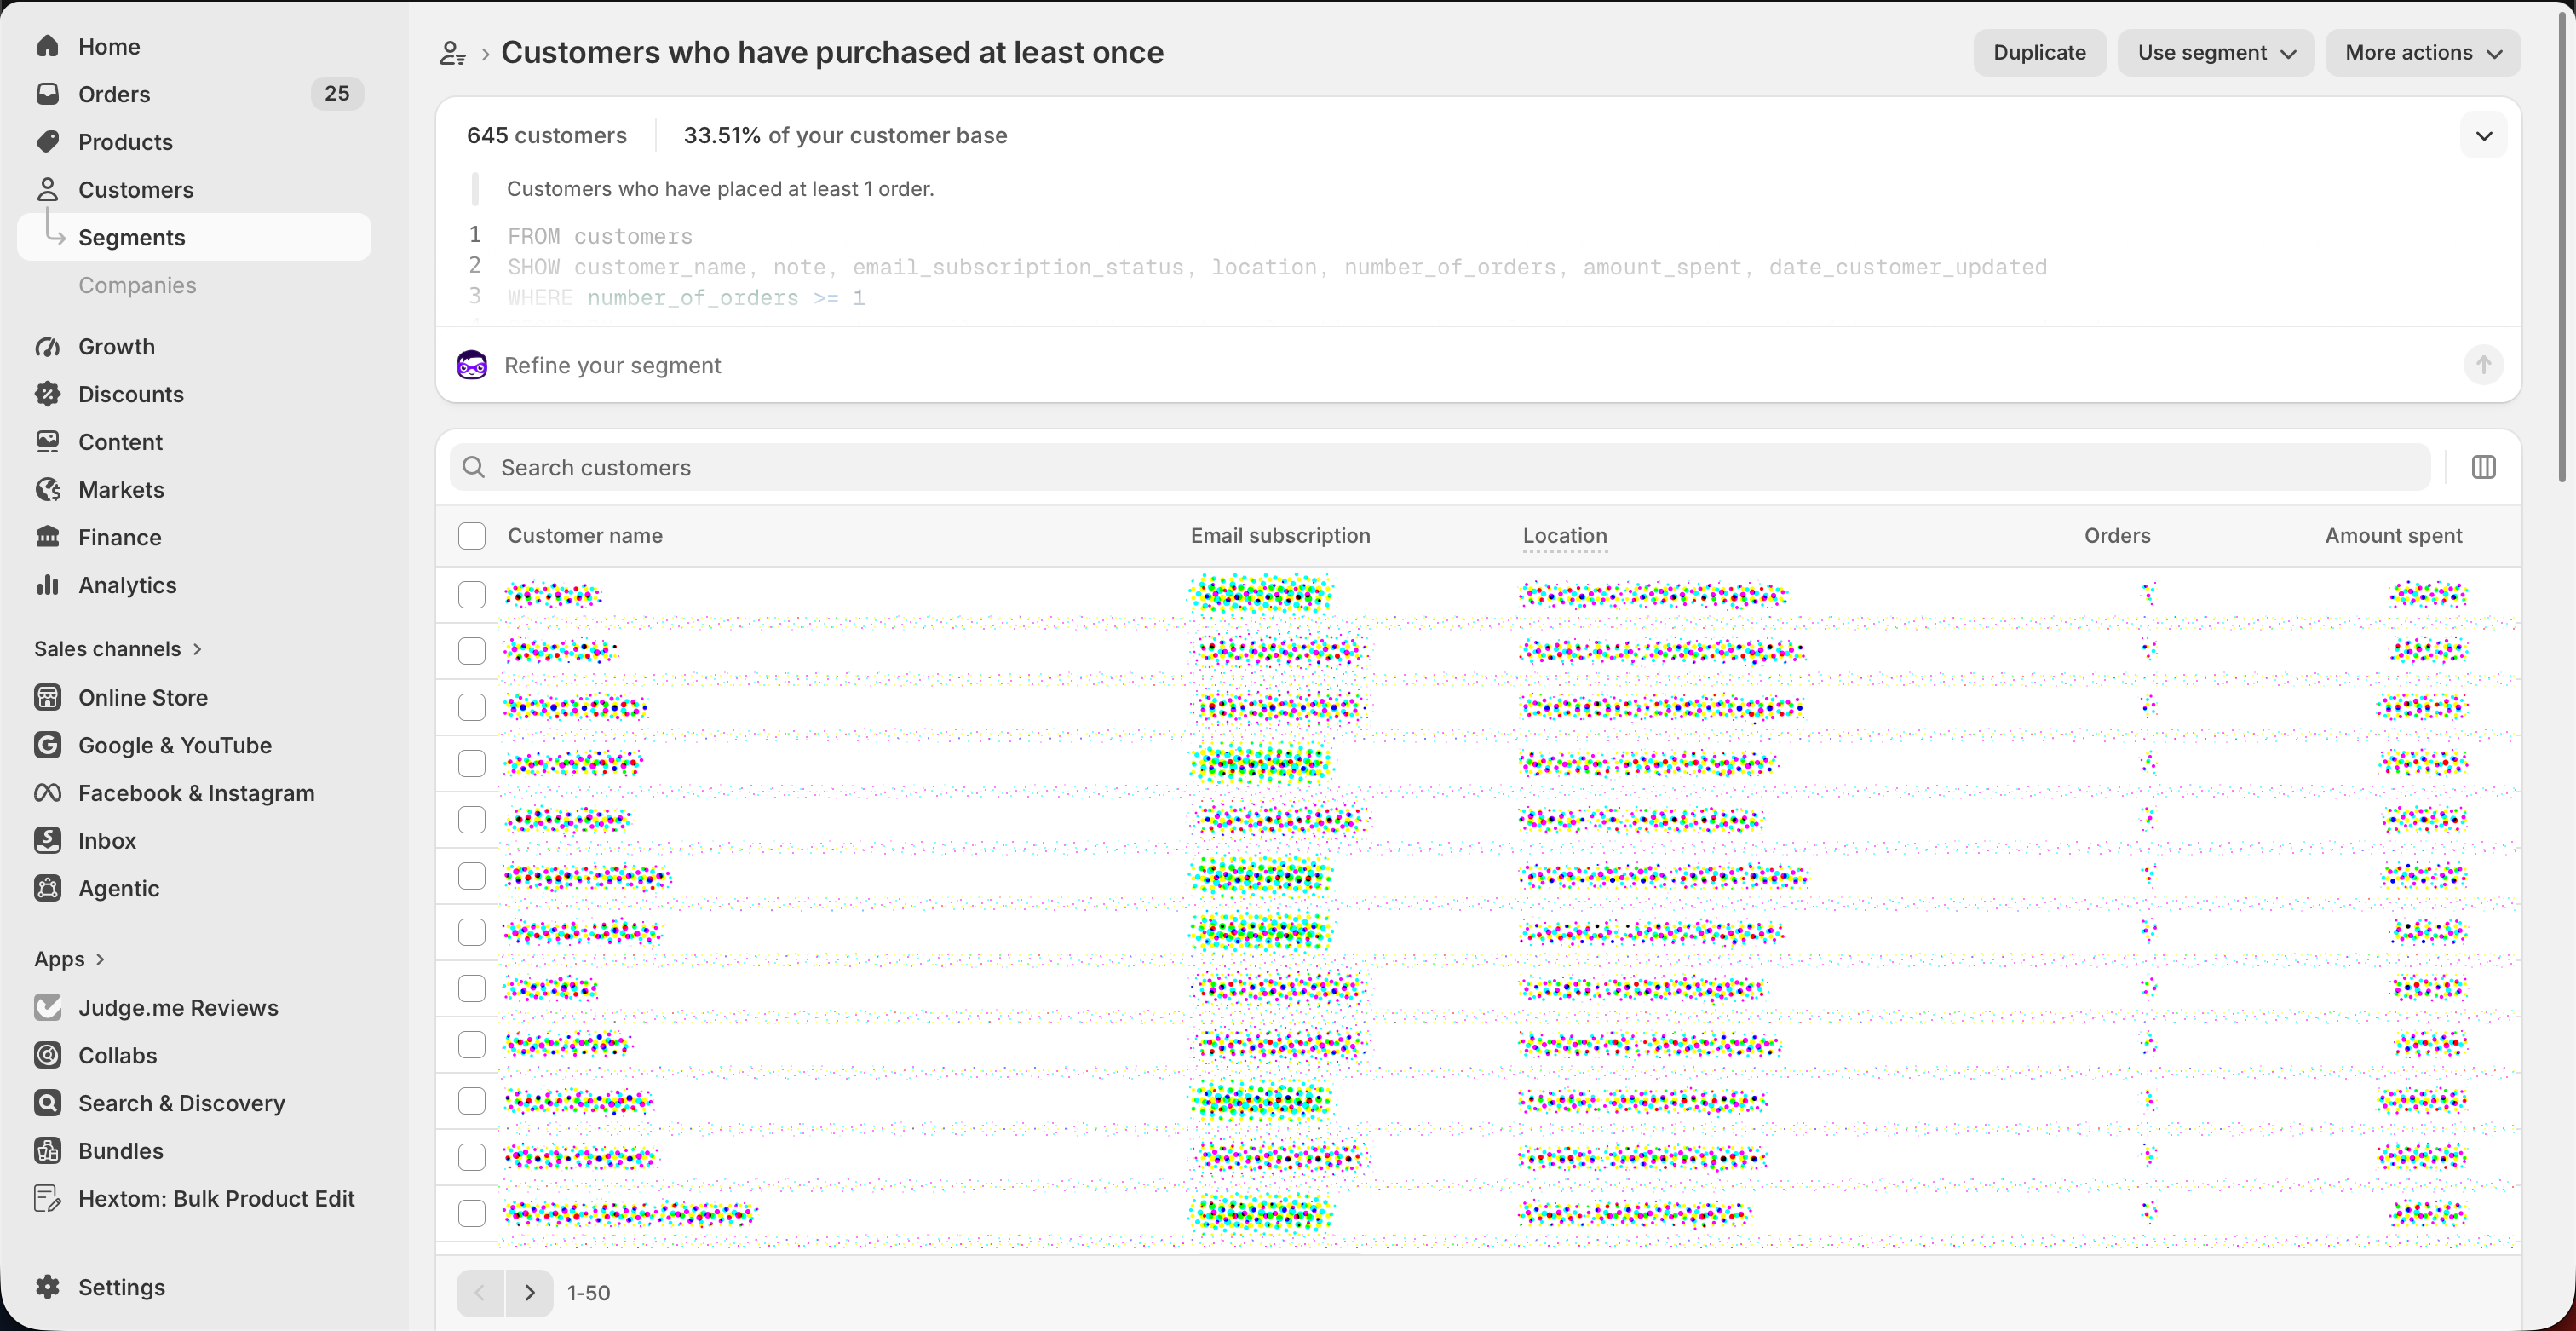
- 3Open More actions → Export
On the segment's page, click More actions in the top right, then Export.
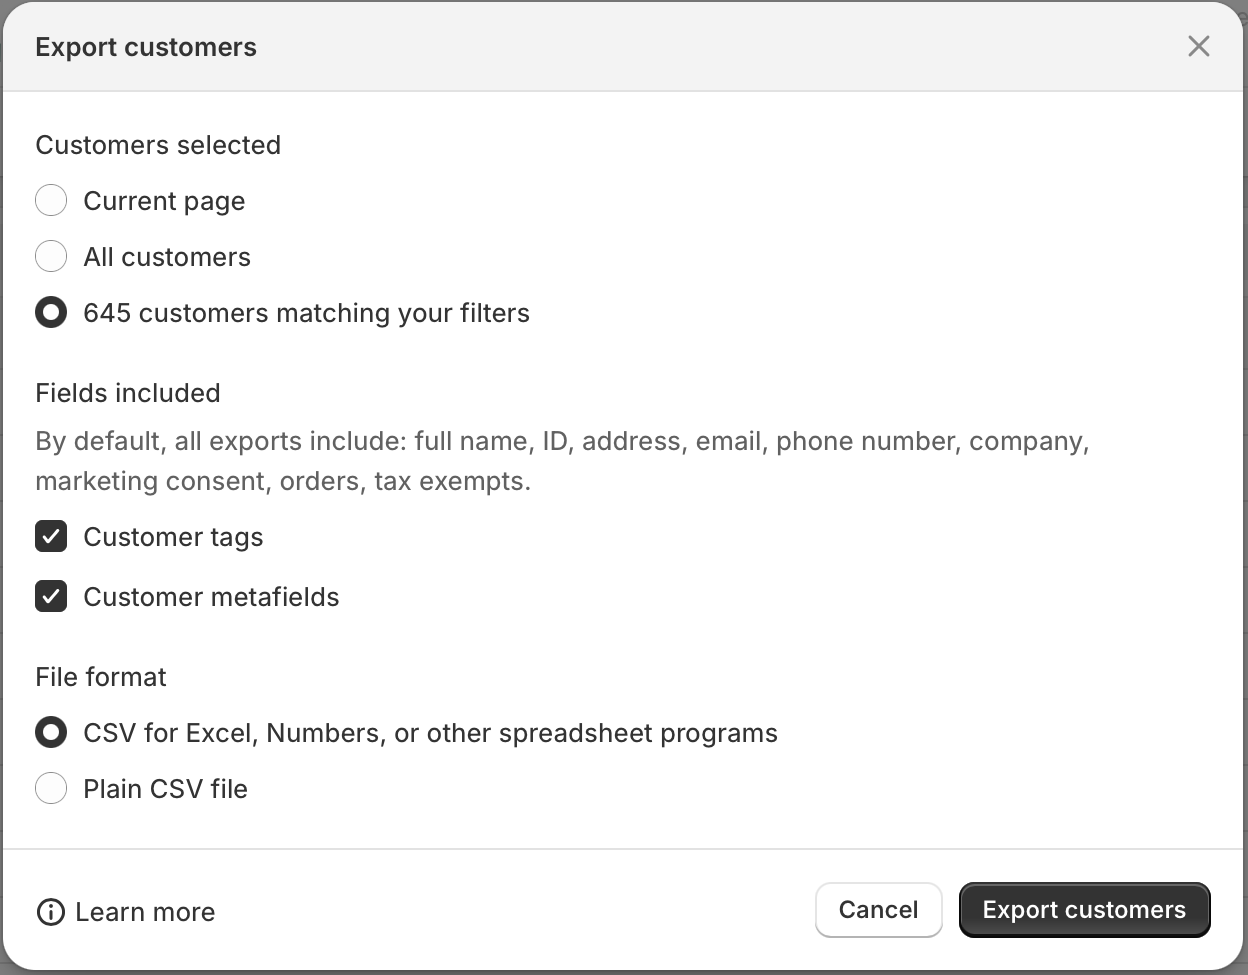
- 4Confirm the export options and export
In the export pop-up, leave “X customers matching your filters” selected (this is everyone in the segment, not just the current page) and keep CSV for Excel, Numbers, or other spreadsheet programs selected as the file format. Click Export customers. Shopify emails you the CSV — usually within a couple of minutes.
- 5Check you have the key columns
The export includes columns like
Email,Phone,First Name,Last Name,Province,Country Codeand — crucially —Total Spent. That last column is the lifetime value Meta uses to build value-based audiences.
Step 2 — Convert the CSV to Meta's format
Shopify's export and Meta's Customer List importer don't use the same column names or formats. The three things that trip people up:
- Phone numbers. Meta wants E.164 format with a country code (e.g.
+447911123456). Shopify often stores them without, or inconsistently. - State / province. Meta matches on full state names in many regions; Shopify exports two-letter codes.
- Lifetime value.Meta's value-based audiences need a dedicated
valuecolumn — you have to map Shopify'sTotal Spentacross to it.
You can do this by hand in a spreadsheet, but it's fiddly and easy to get wrong. Our converter does all of it in one step: drop in the Shopify customers_export.csv and it returns a Meta-ready file with phones normalised, states expanded, and lifetime spend placed in the value column. The conversion runs entirely in your browser — the customer list is never uploaded to us.
Step 3 — Create a Customer List audience in Meta
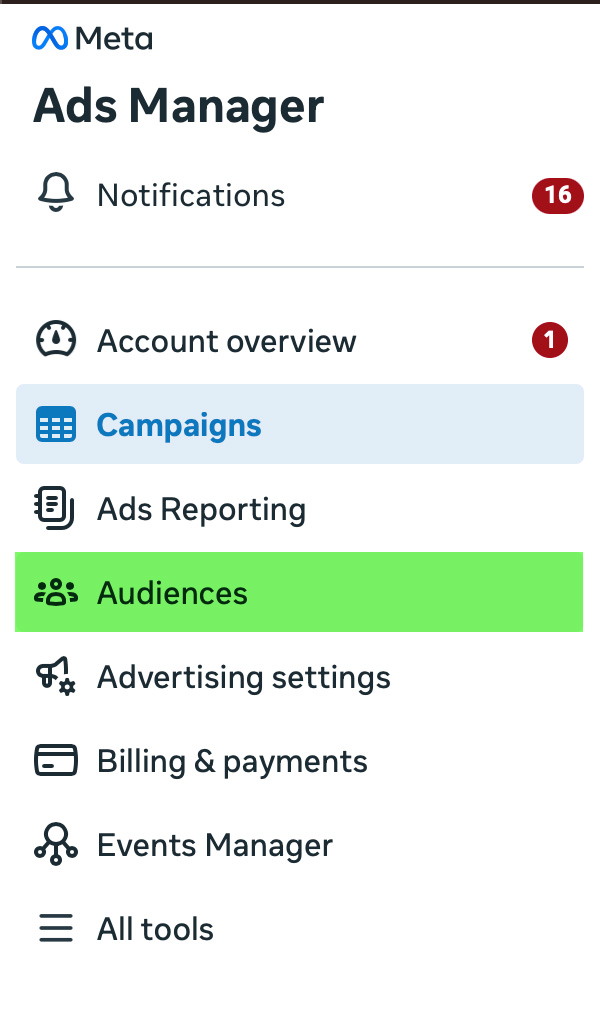
- 1Open Audiences in Meta Ads Manager
In Meta Ads Manager, click Audiences in the left sidebar.
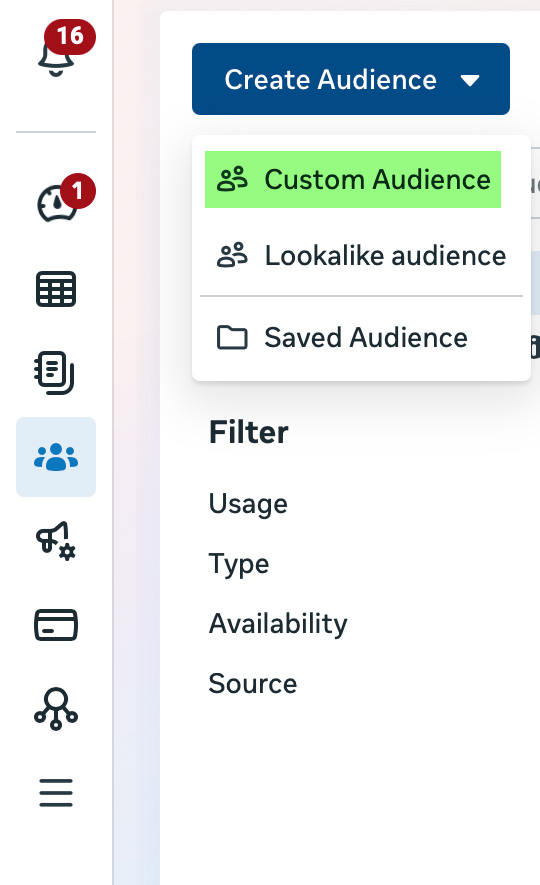
- 2Create audience → Custom Audience
Click Create Audience at the top of the page, then choose Custom Audience from the dropdown.
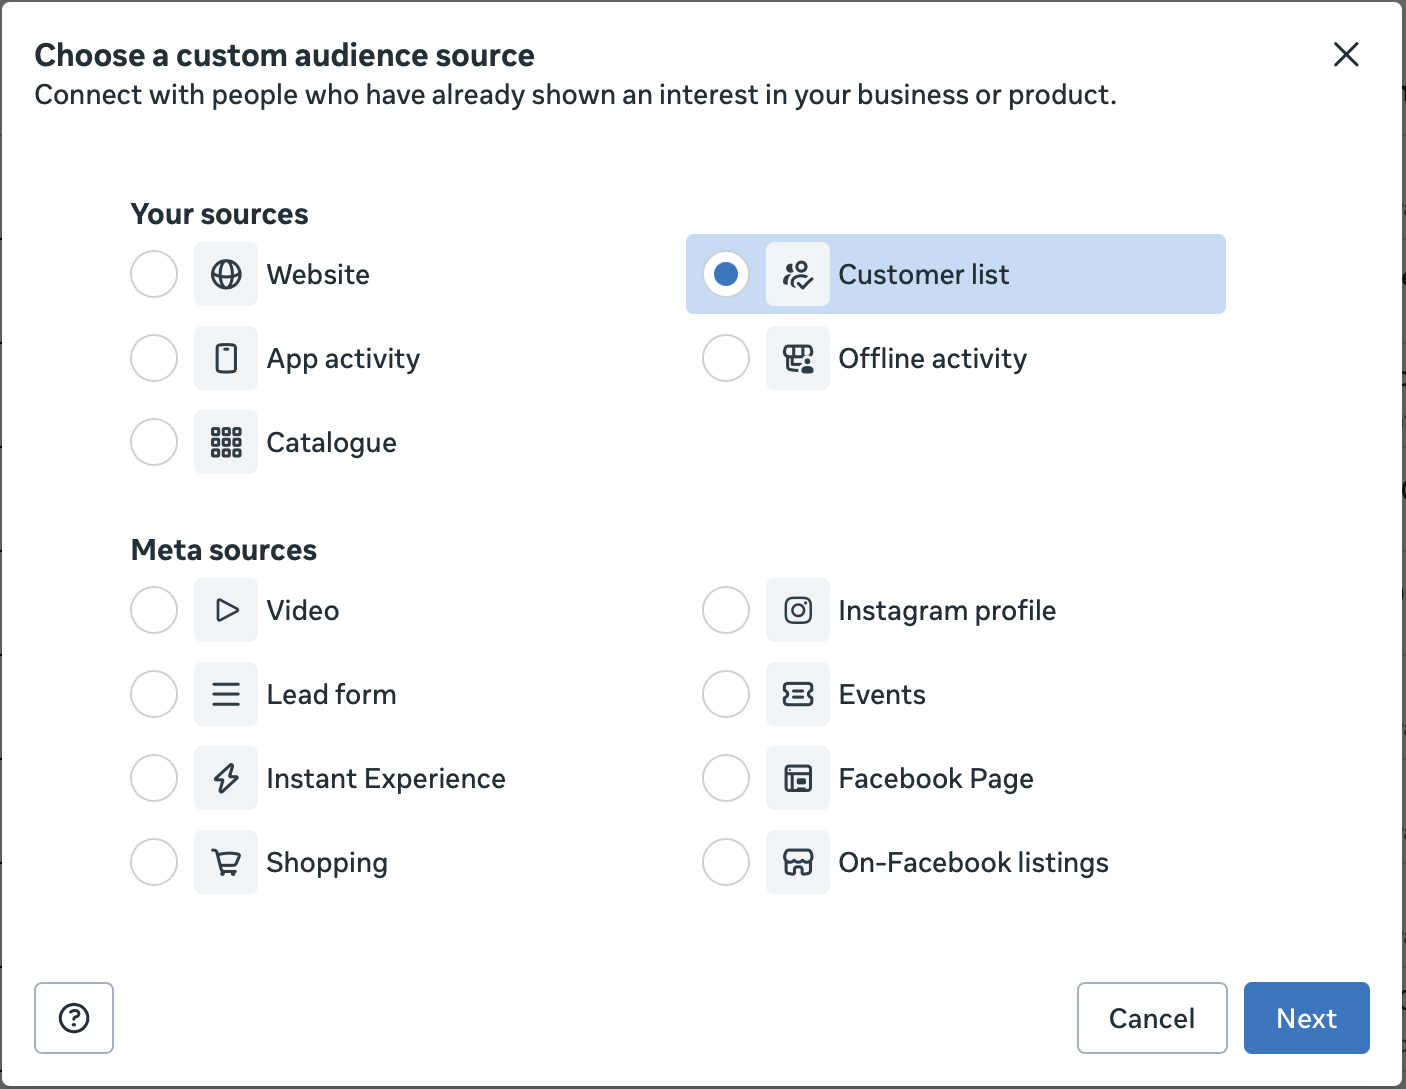
- 3Choose Customer list as the source
In the Choose a custom audience source pop-up, select Customer listunder “Your sources” and click Next.
- 4Prepare list → click Next
The wizard opens on Prepare list. There's nothing to change here — click Next to move to Add list.
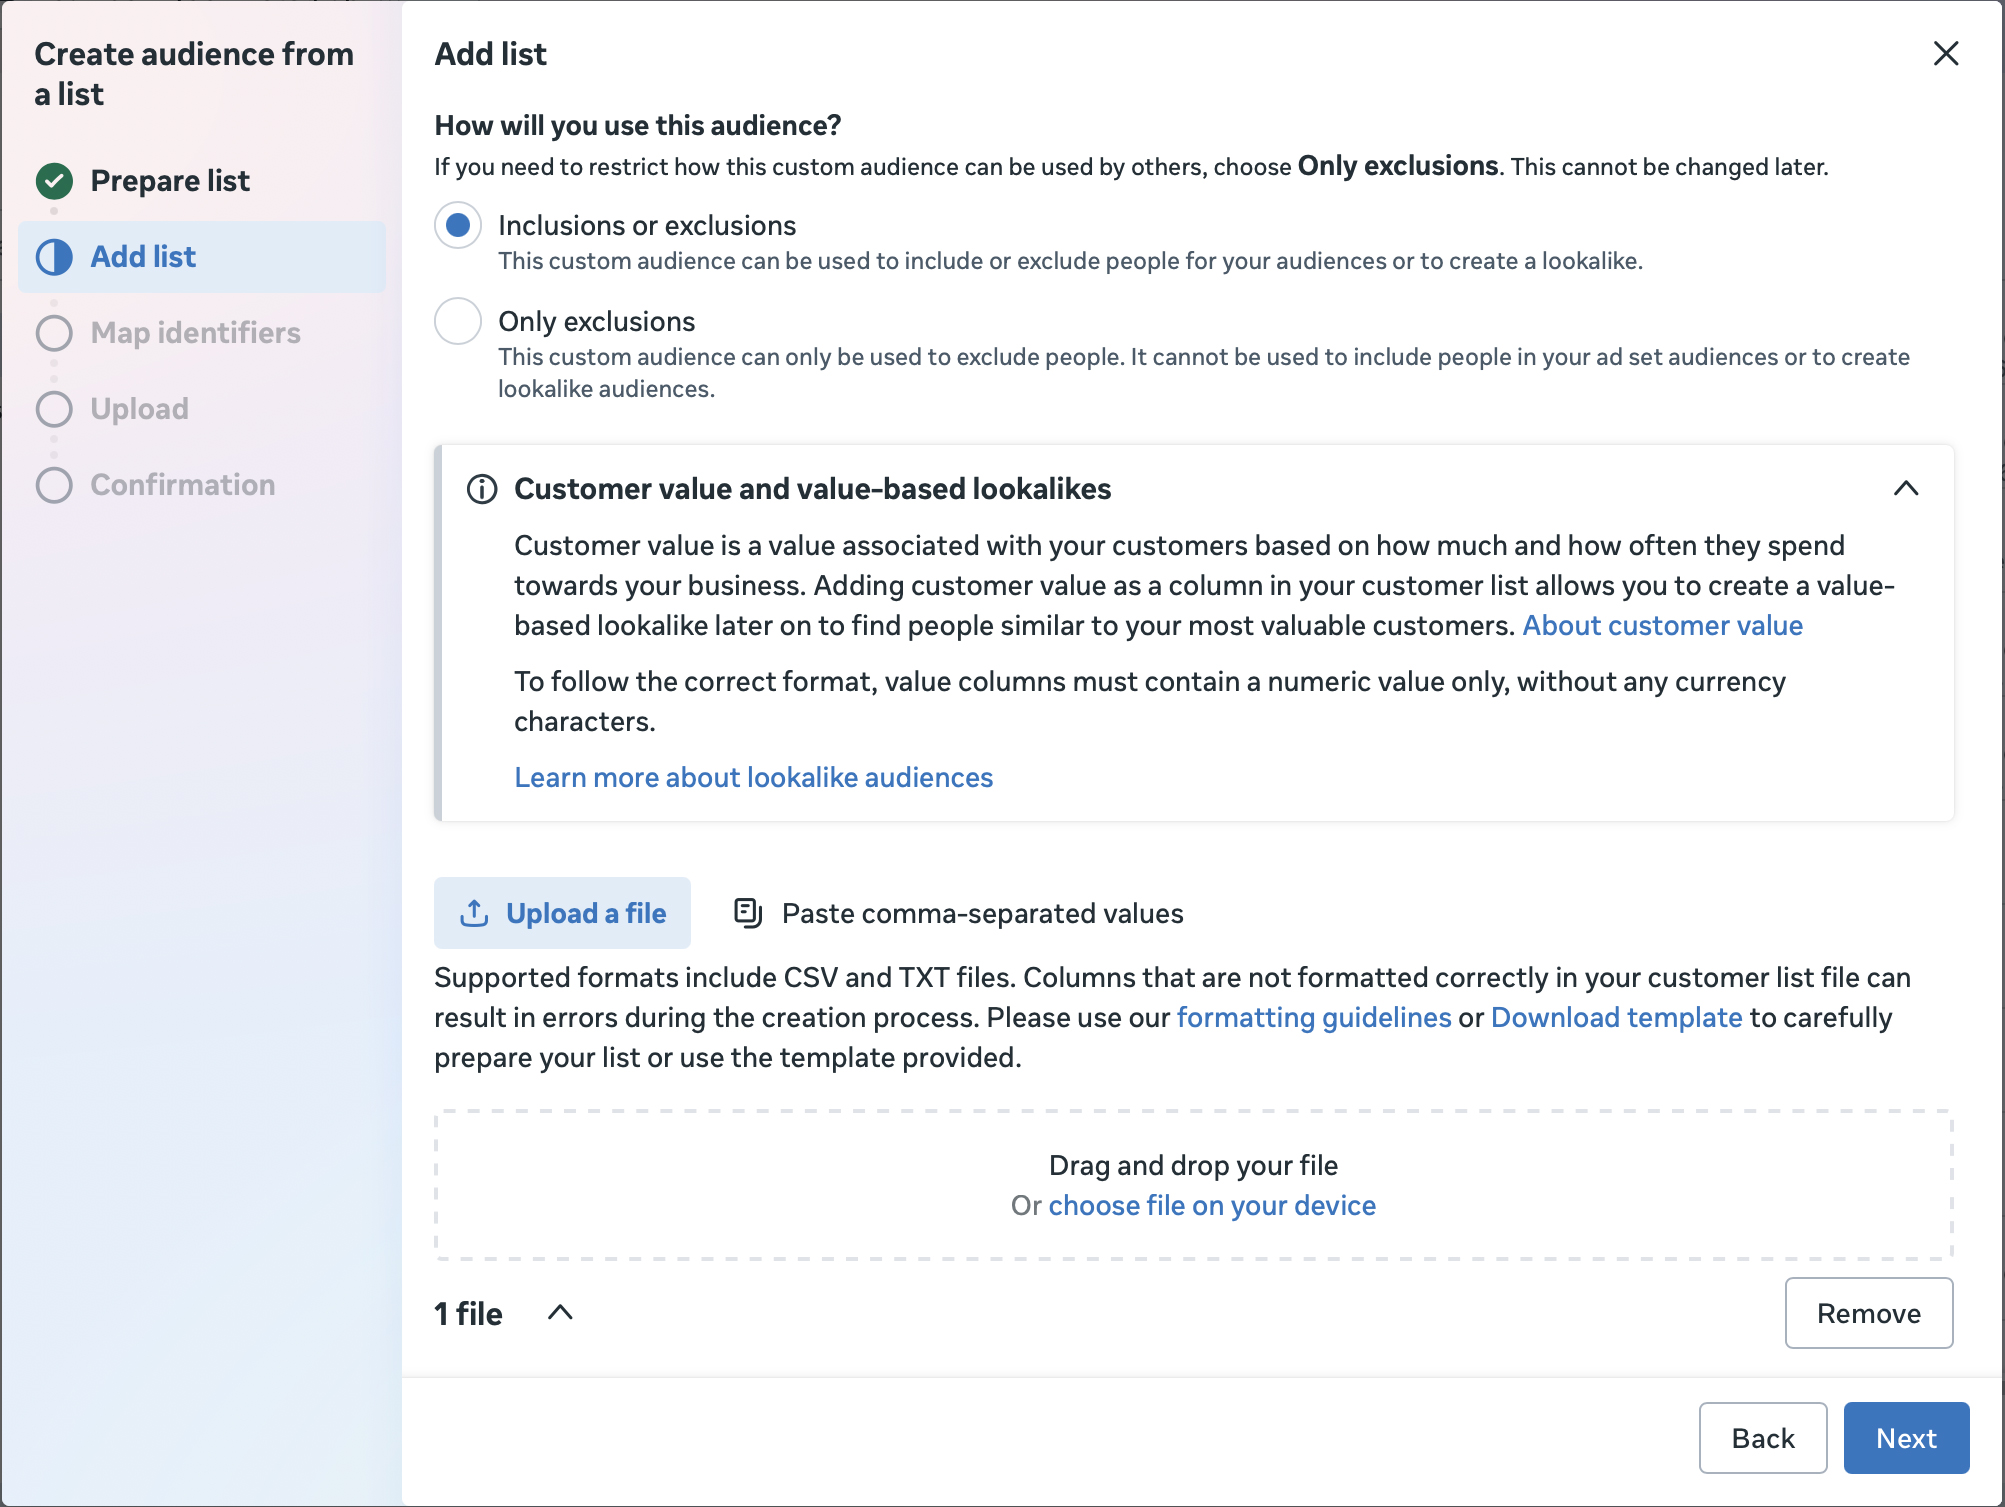
- 5Upload the converted CSV
Under Add list, upload the file from Step 2. Leave Inclusions or exclusionsselected (not “Only exclusions”) so you can also use this list for a Lookalike later.
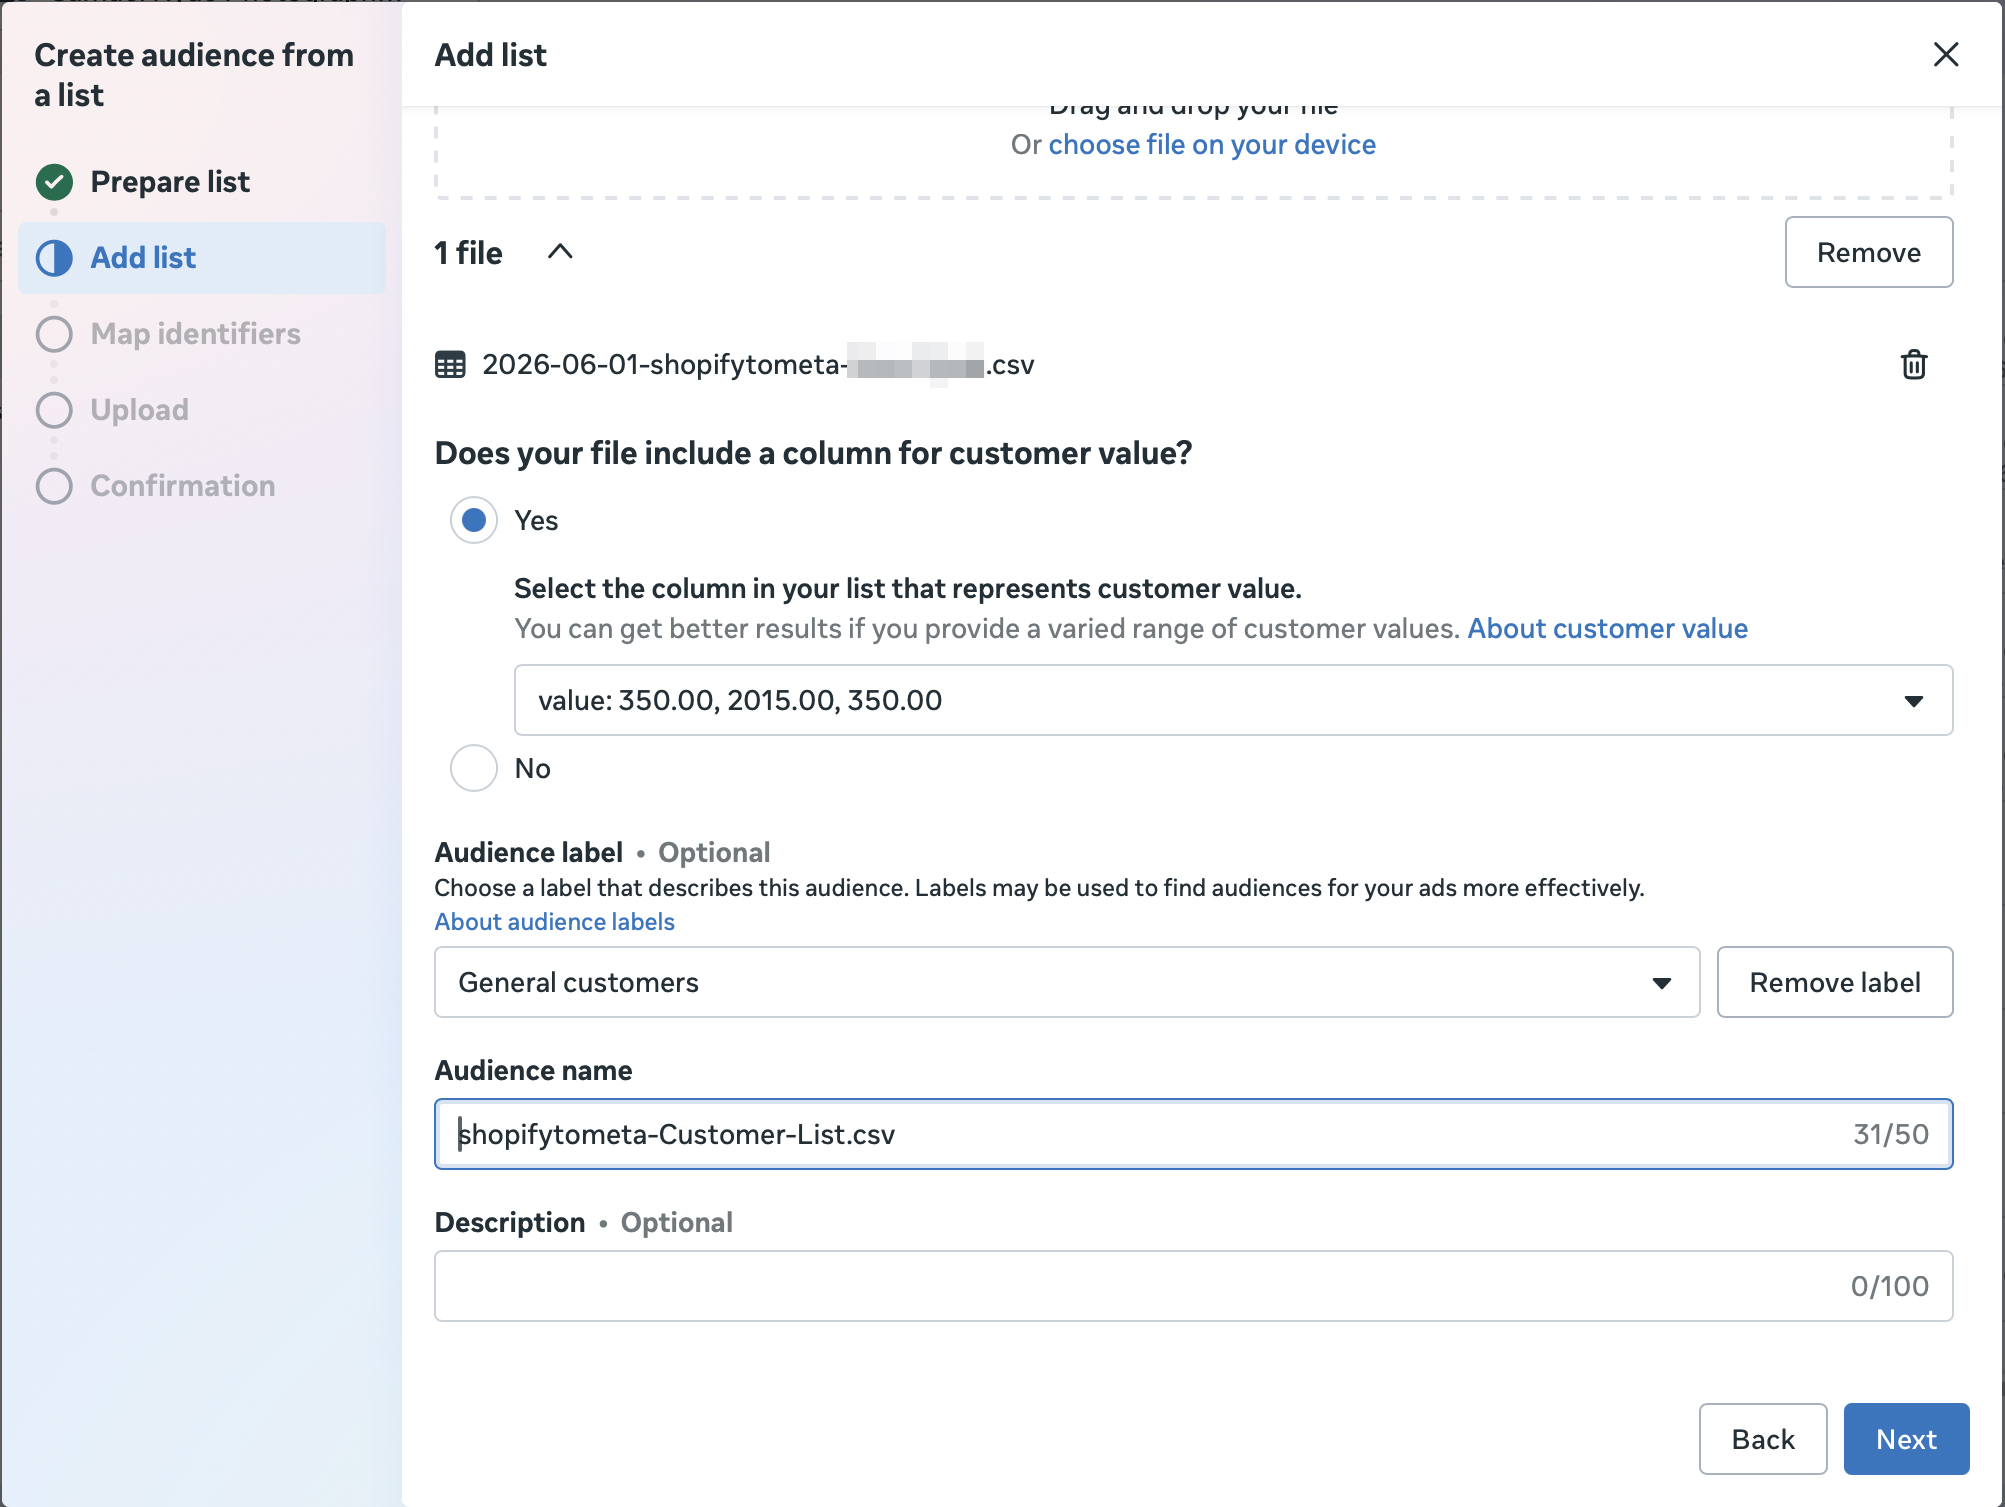
- 6Confirm customer value, name the audience, and click Next
Scroll down. Meta will ask “Does your file include a column for customer value?” — answer Yes and select the
valuecolumn (this is the lifetime-spend column from Step 2). Add an audience label and name if you want to keep track of your uploads, then click Next.
- 7Check Map identifiers, then Import and create
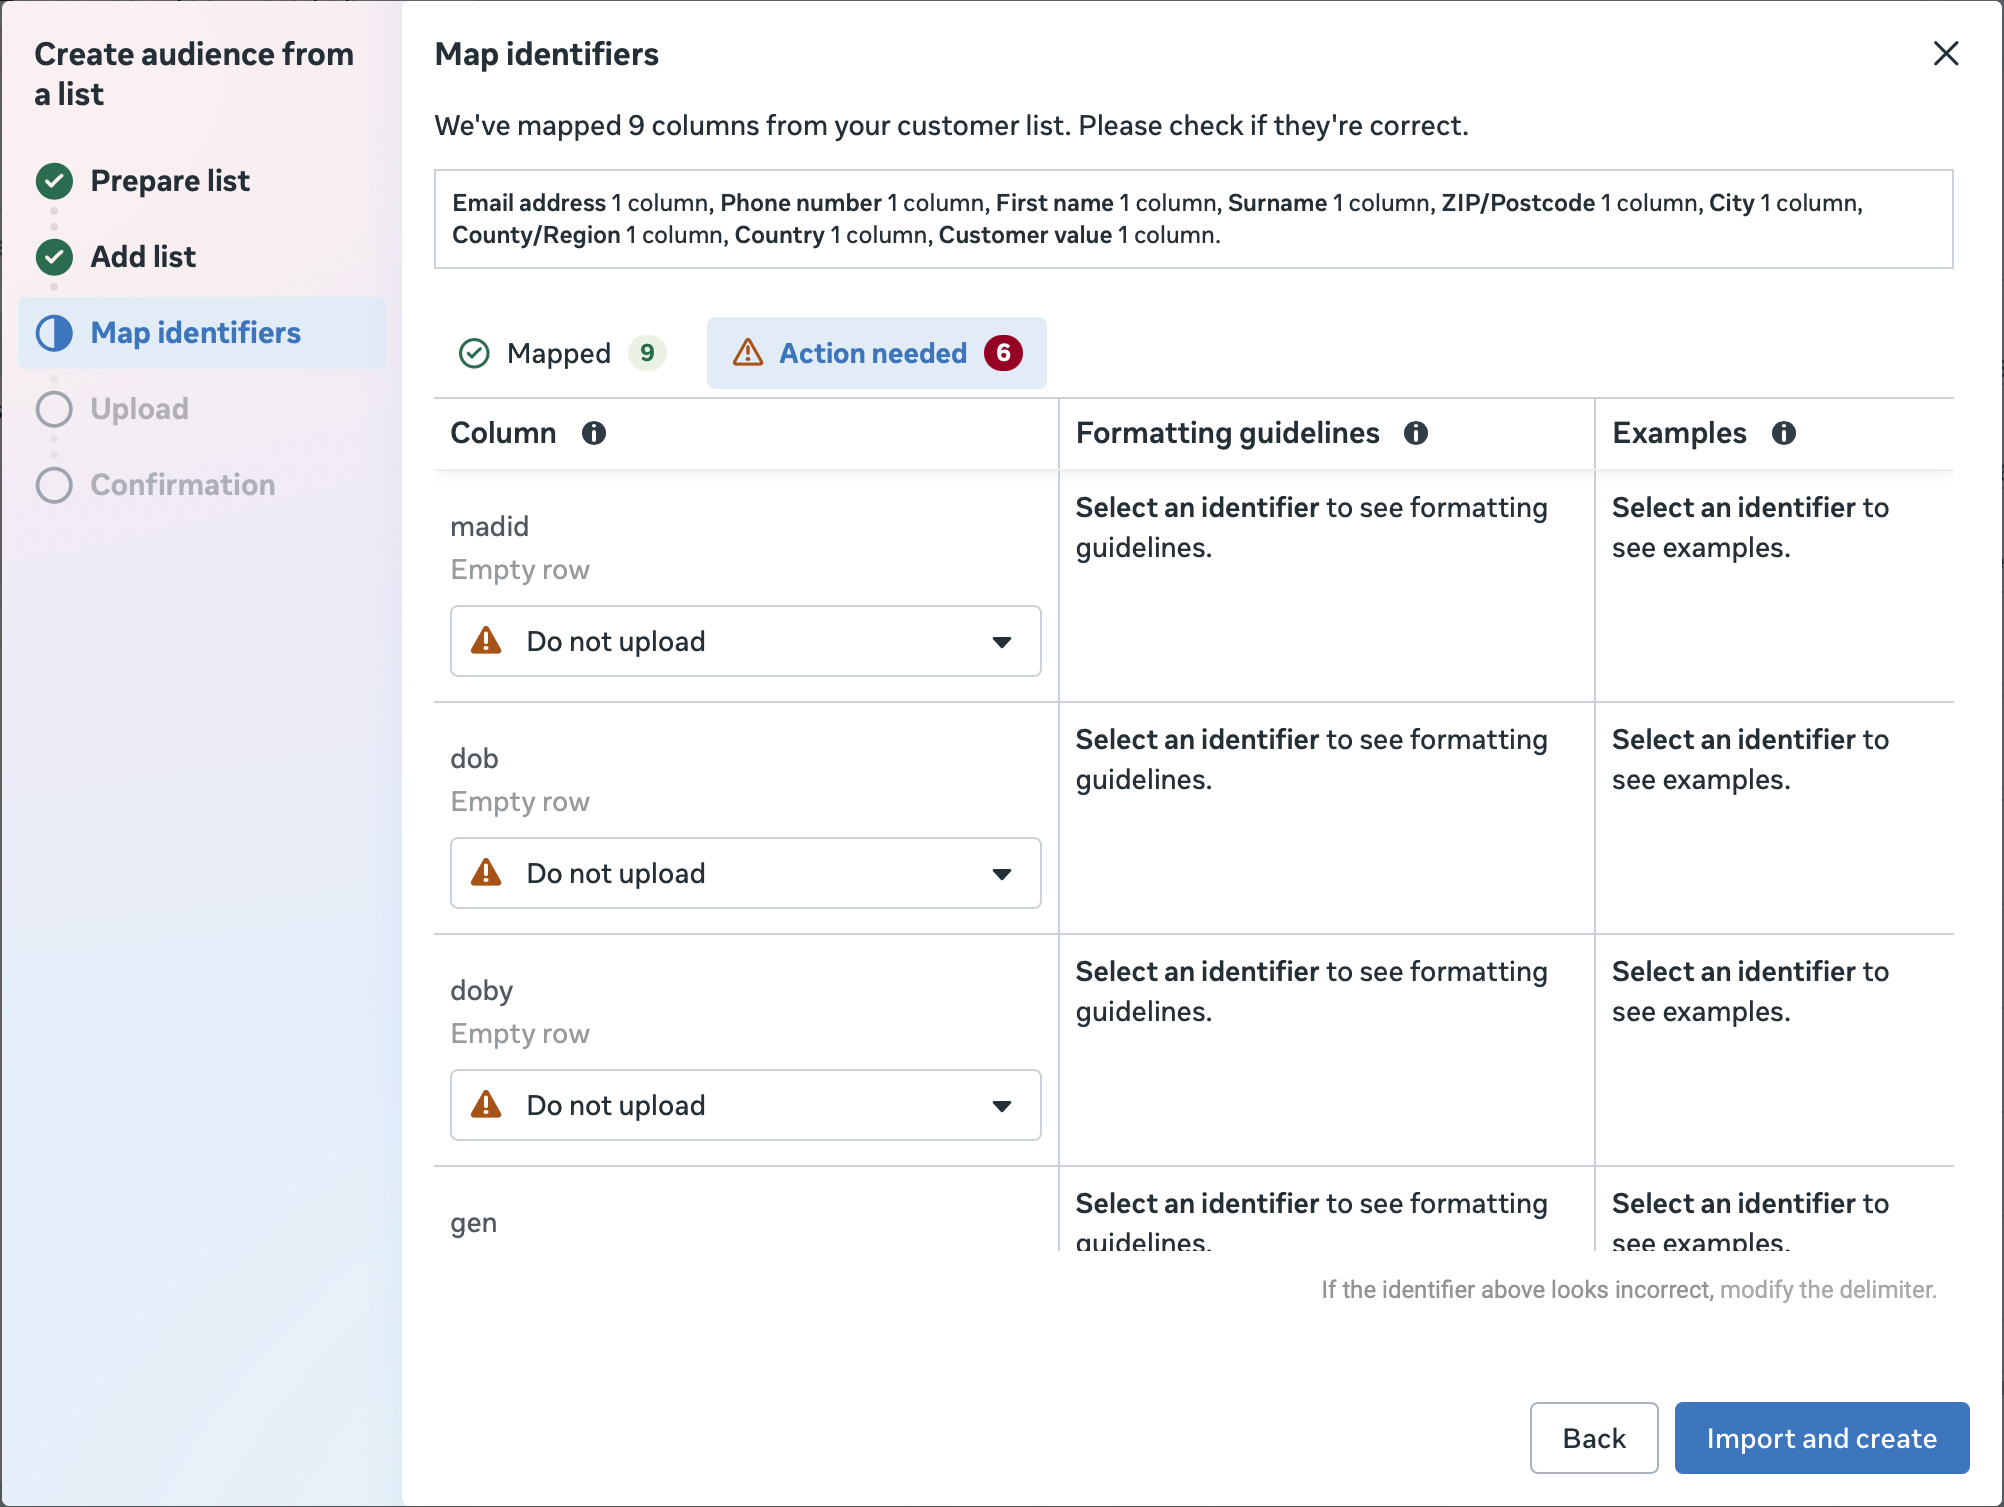
On Map identifiers, Meta should show 9 columns mapped — email, phone, first name, surname, ZIP/postcode, city, county/region, country, and customer value — these are the data points that came from Shopify. You may also see an “Action needed” tab listing a handful of extra columns (like
madid,dob,gen) set to “Do not upload” — these are optional Meta fields Shopify doesn't provide, so it's safe to ignore them. Click Import and create.
- 8Complete Upload and Confirmation
Follow the remaining Upload and Confirmation steps. Matching and processing usually takes anywhere from a few minutes to a few hours, depending on list size.
Step 4 — Put the list to work
Once your customer list has finished processing, there are two places to use it:
- 1Add it to Advertising settings as an existing customer list
Go to Advertising settings in the Ads Manager sidebar (just below Audiences) and add the list you just uploaded under existing customers. This lets Meta exclude — or specifically target — these customers across your account without you having to add the audience to every ad set manually.
- 2Build a value-based Lookalike from the list
Back in Audiences, select your customer list, then Create audience → Lookalike audience using it as the source. Because your list includes lifetime value, Meta offers a value-based Lookalike — it finds people who resemble your highest-spending customers, not just any buyer.
- 3Pick your audience size
A 1% Lookalike is the tightest match; 5–10% trades precision for reach. Many advertisers build several (1%, 5%) and test them as separate ad sets.
How often should you refresh?
A Customer List is a static snapshot — it doesn't update itself. As you gain new customers and existing customers place repeat orders (changing their lifetime value), the list drifts out of date and your Lookalikes age with it. Re-upload periodically to keep the seed fresh. There's an interactive calculator on the homepage that suggests a cadence based on your monthly order volume — most stores land somewhere between monthly and fortnightly.
Frequently asked questions
Doesn't the Shopify Facebook & Instagram app already send my purchases to Meta?
It sends purchase events to Meta's pixel in real time, but only what it captures going forward, and it loses 30–50% of events to iOS ATT, ad blockers and consent banners. A customer-list upload sends your full historic customer base with true lifetime value — a separate, complementary audience source.
Will Meta match every customer in my list?
No. Meta matches the hashed email and phone numbers in your list against Facebook and Instagram accounts. Typical match rates are 60–80% depending on data quality. Including both email and phone improves the match rate.
How often should I re-upload my customer list?
Whenever a meaningful share of your list has changed — new customers plus existing customers whose lifetime value moved. As a rough guide, monthly works for most stores; high-volume stores benefit from fortnightly or weekly. There's an interactive calculator on the homepage.
Is it safe to upload my customer data?
Meta requires customer data to be hashed before upload, and our converter processes your file entirely in your browser — your customer list is never stored on our servers. You remain the data controller and must have a lawful basis for marketing use.